Urbit for Normies: Installing Urbit on a Cloud Host
Step-by-step Urbit install guide for users with no prior technical knowledge. You will have a set it and forget it Urbit server accessible from any web browser in about 1 hour's time, on a $10/mon VPS. This is the recommended best practice install for Urbit unless you maintain your own home server.
This guide uses Digital Ocean as the cloud provider for its easy to read user interface, but any VPS service can be used.
Note: $10/mon is less than what you'd pay for a full-service Urbit hosting provider (~$12-15/mon), which I don't currently recommend due to their unreliability and limited data control.
You can also try out Urbit at no-cost on your local machine easily on Windows/OSX/Linux with Port, but this setup you'll have to setup port forwarding if you want to access your server from other devices. It's not ideal unless you run your own always-on home server.
What is Urbit?
Urbit is famously hard to explain because it's extremely ambitious, a fundamental reimagination of the computer according to contemporary principles. The short answer tagline is Urbit is an open source platform for sovereign personal computing, or alternatively, a new internet from first principles.
In practice, Urbit today is a social network supporting groupchat, shared journals, personal blogs and native crypto integration that is fully decentralized and respectful of data self-ownership & privacy by design.
Urbit is accessed from any standard web browser, but due to its decentralized design, you can only get online by running your own Urbit server which doubles as your Urbit account, which this guide will walk you through.
You can read a more in-depth explanation here: Urbit for Normies.
Step 1: Setup a Virtual Private Server
This guide will use Digital Ocean due to its clear user interface and web console. If you don't have any technical background or are on Windows without a terminal setup, it's recommended to use it.
If you'd like to use your own VPS provider, Urbit's recommended specifications are 2GB RAM and 5-50GB storage over a year of use. Ubuntu 20.04 is a standard environment for install. If you do this, skip forward to 1b. Access the VPS to continue.
1a. Create a Digital Ocean droplet
Create an account on Digital Ocean.
Create a droplet (DO's term for a virtual server) with the following settings:
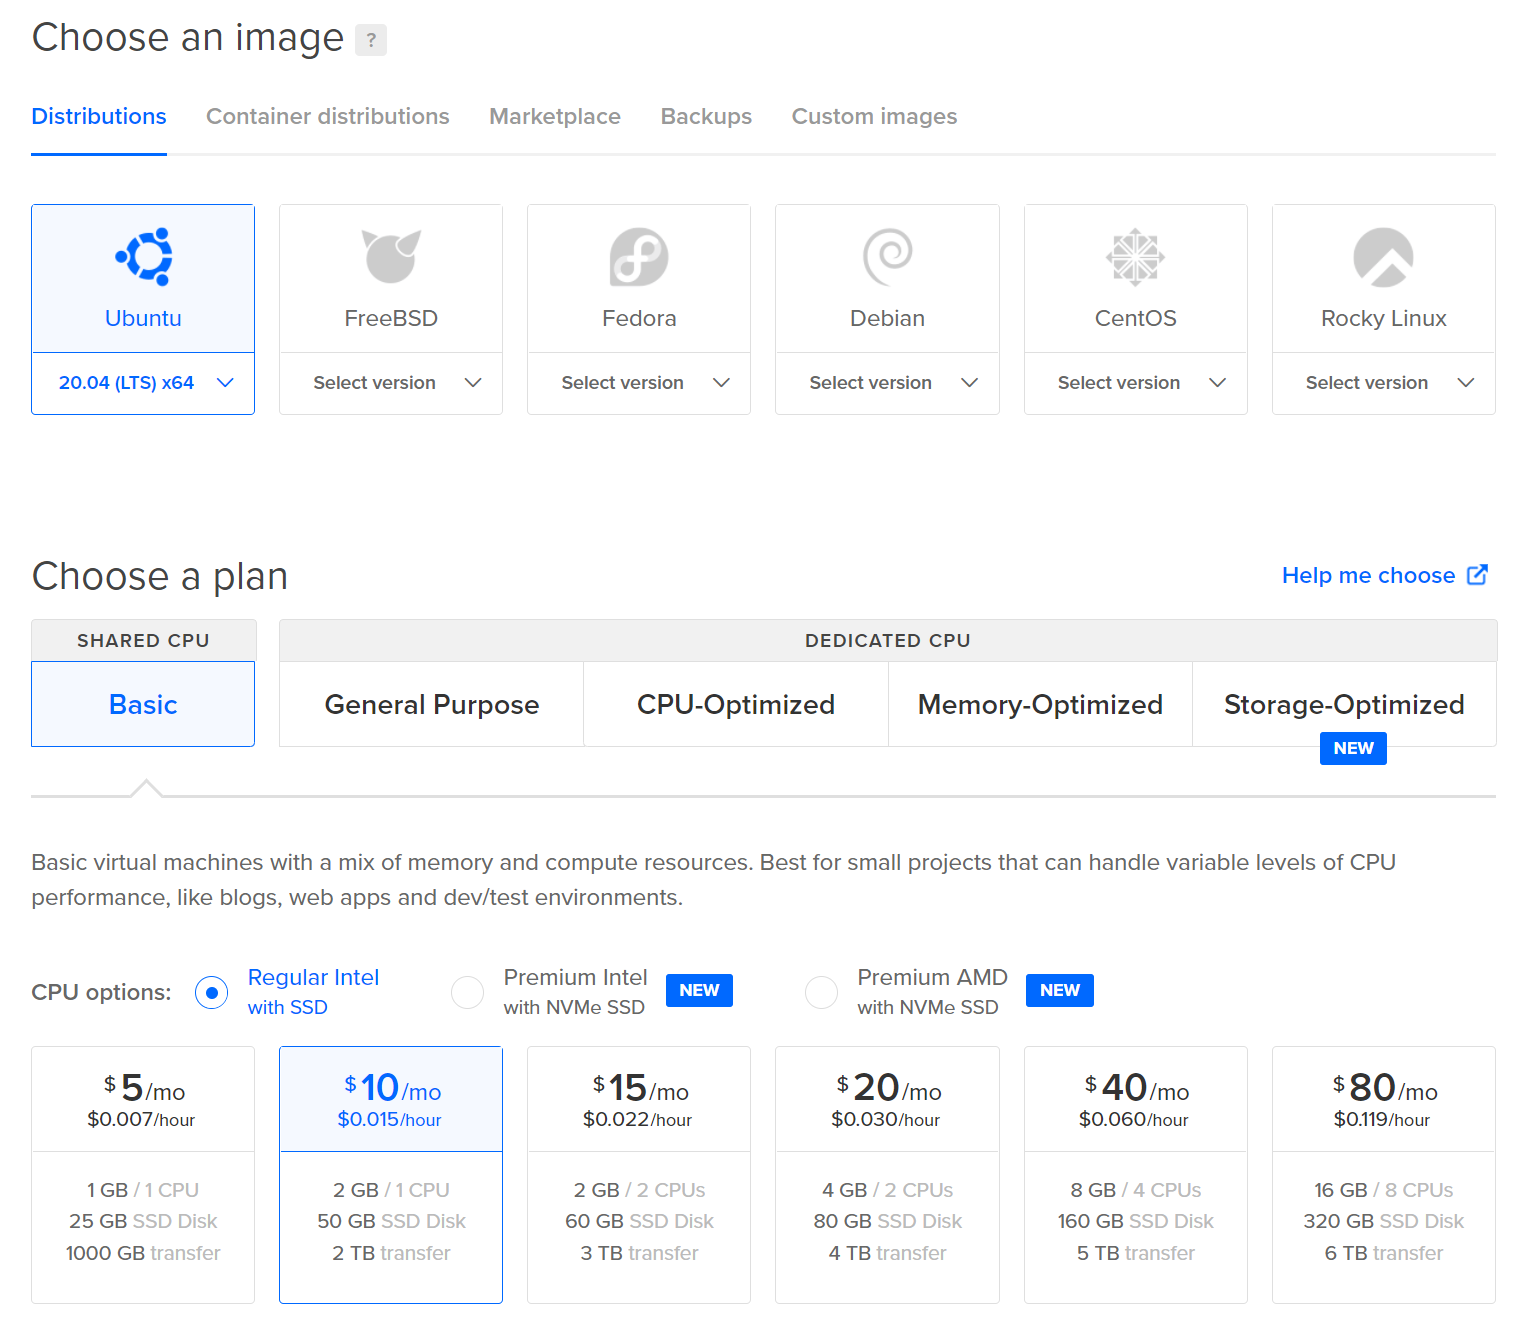
- Image: Ubuntu 20.04 x64
- CPU: Regular Intel with SSD
- Plan: $10/mo - 2GB RAM / 1 CPU, 50GGB SSD, 2TB Transfer
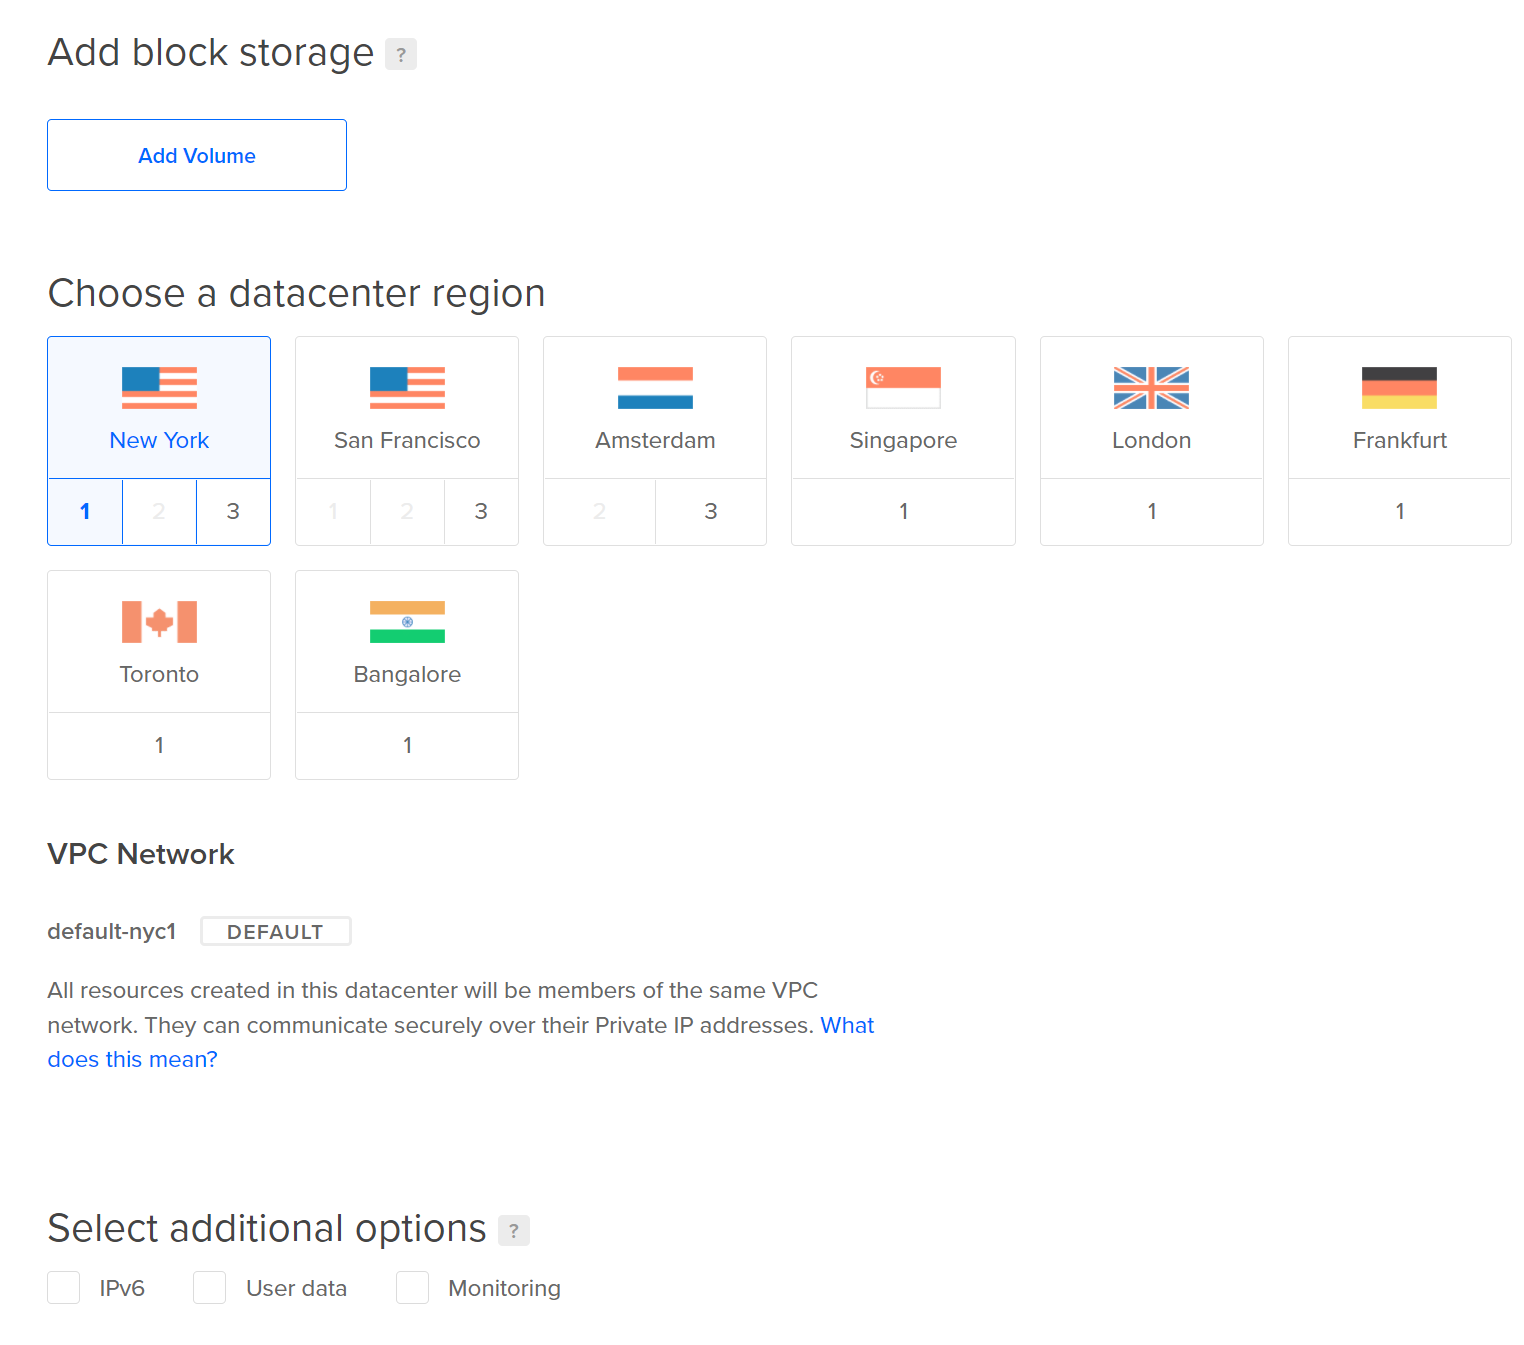
- Add block storage: Skip
- Datacenter Region: Choose the region closest to you.
- VPC Network: Skip
- Additional Options: Skip
- Authentication: SSH keys. Click
New SSH Keyand add your SSH key. If you don't have one, follow the instructions Digital Ocean gives you to create one. - How many Droplets: 1
- Choose a hostname: This will be the hostname of the box you ssh into (can be whatever you want, I used my Urbit planet name).
- Add tags: None
- Project: It'll select your default.
- Backups: Optional (it costs a little extra, but I have it enabled for peace of mind).

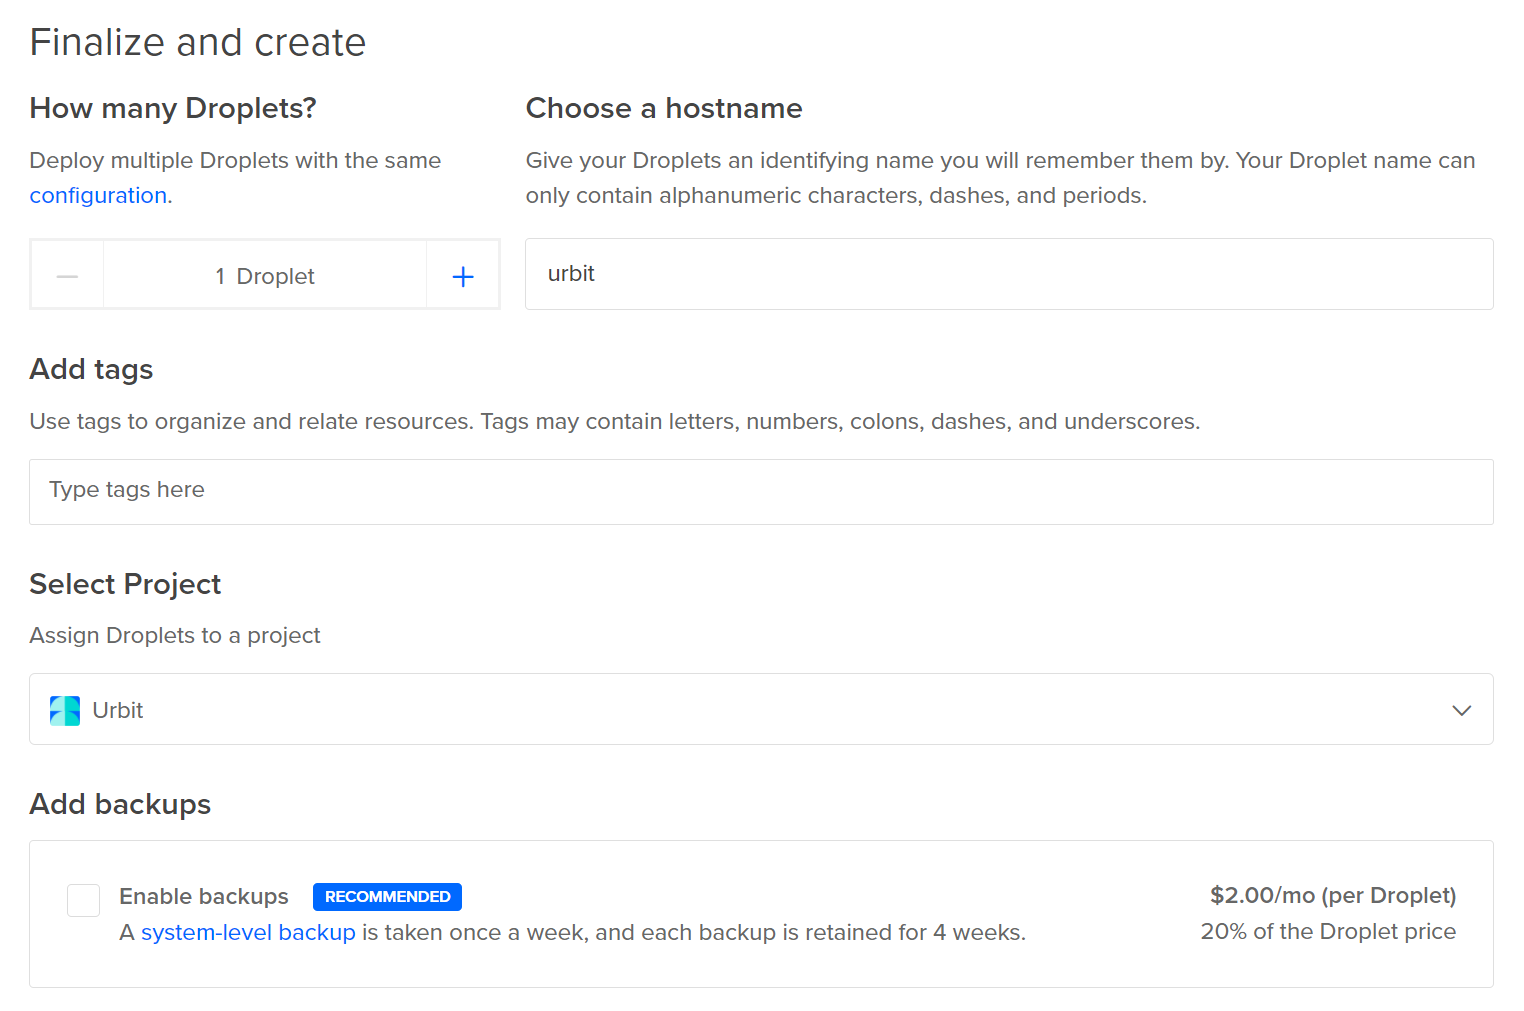
All done, click Create Droplet to move forward.
1b. Access the VPS
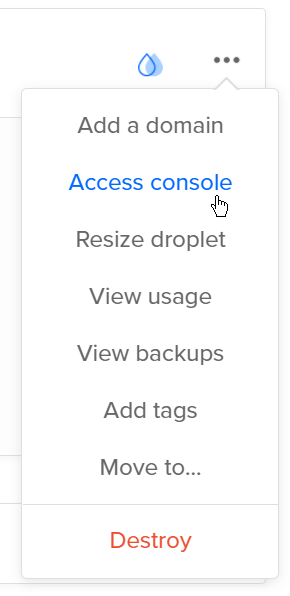
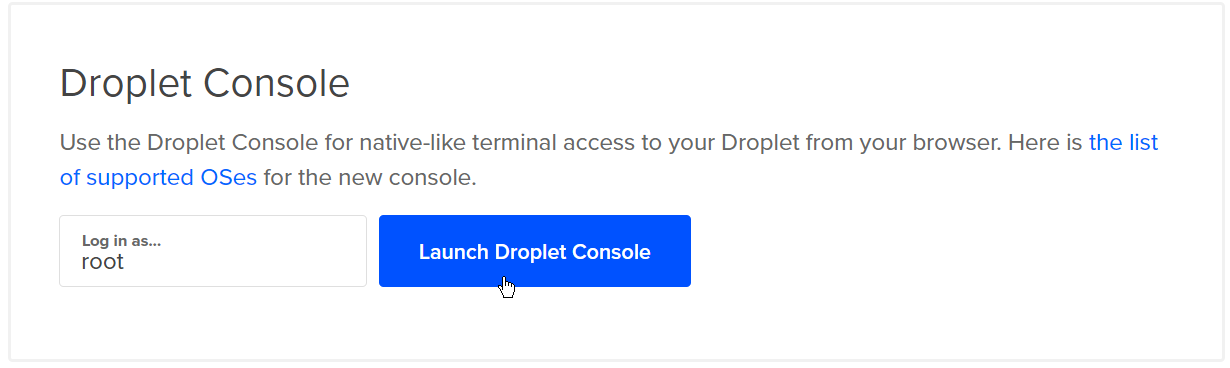
If you're on Digital Ocean, you can access the console directly from the web interface by clicking the ... > Access console, then Launch Droplet Console
If you're running a different VPS or prefer to operate from your computer terminal, ssh using your IPv4 address: $ ssh root@your_server_ip.
If you set a passphrase on your ssh key, you'll be asked for it. If not, you should automatically be logged in.
Step 2: Configure the Droplet and Install Urbit
Setup Firewall
Before we install Urbit, we'll setup a firewall on the droplet and open port 34543 for Urbit to use. Paste the following commands:
sudo ufw allow OpenSSH
sudo ufw allow www
sudo ufw allow https
sudo ufw allow 34543/udp
sudo ufw enable
Next we'll allocate swap space on the server for Urbit. Paste the following commands:
sudo fallocate -l 2G /swapfile
sudo chmod 600 /swapfile
sudo mkswap /swapfile
sudo swapon /swapfile
sudo cp /etc/fstab /etc/fstab.bak
echo '/swapfile none swap sw 0 0' | sudo tee -a /etc/fstab
Install Urbit
Now we're ready to install Urbit on your server. This part is actually very easy - just paste and run all the following commands into your console:
mkdir ~/urbit
cd ~/urbit
wget --content-disposition https://urbit.org/install/linux64/latest
tar zxvf ./linux64.tgz --strip=1
cd ..
~/urbit/urbit
After the install completes, you will see a block of output beginning with the line confirm its success:
Urbit: a personal server operating functionStep 3: Obtain a planet
An Urbit ID is needed to enter the system. Planets are persistent ID's available for purchase, but Comets are available as free non-persistent "guest" ID's for trying out the system.
If you'd like to skip getting a planet for now and jump immediately into Urbit, you can boot a comet by running the following command, then skipping to Step 5: Enter Urbit Landscape:~/urbit/urbit -c mycomet
As of October 2021, Urbit planets are going for a historical high average of ~$100-150 USD, though for a long time they were sold for $10-20. You will also need another ~$50-150 in Ethereum for the gas fees associated with purchasing the planet as well as initializing its network keys.
3a. Purchase a Planet
Planets need to be purchased as an Ethereum ERC-720 NFT. If you have never purchased Ethereum NFT's and don't have an Ethereum Web3 wallet, follow these instructions to be setup with MetaMask. If you already own a planet, skip to 3b. Obtain your Planet's Keyfile.
Planets can be bought with Ethereum from NFT marketplaces, such as the following:
3b. Obtain your Planet's Keyfile from Bridge
We need to authenticate your planet to obtain its keyfile to upload to your Urbit server.
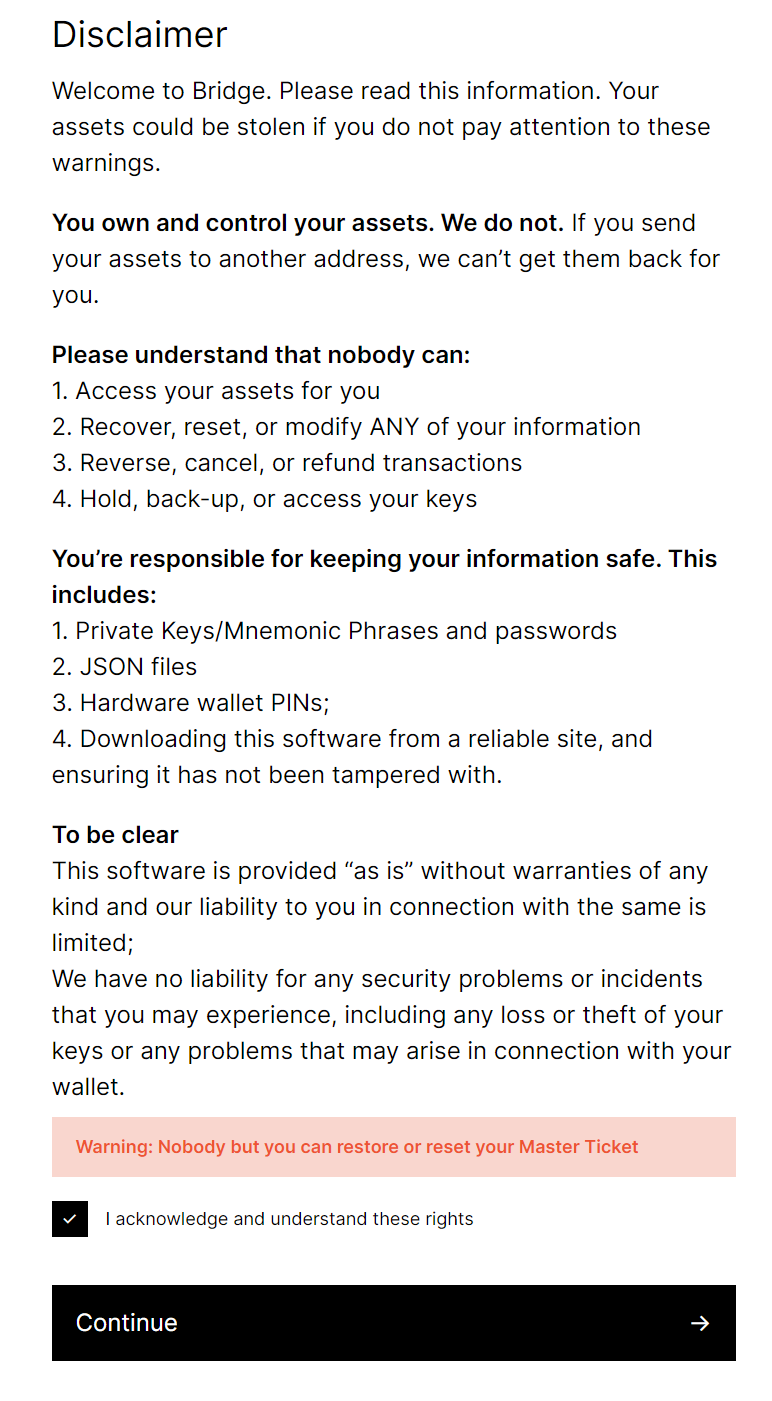
Goto bridge.urbit.org. You will see the following disclaimer, check the box and hit Continue
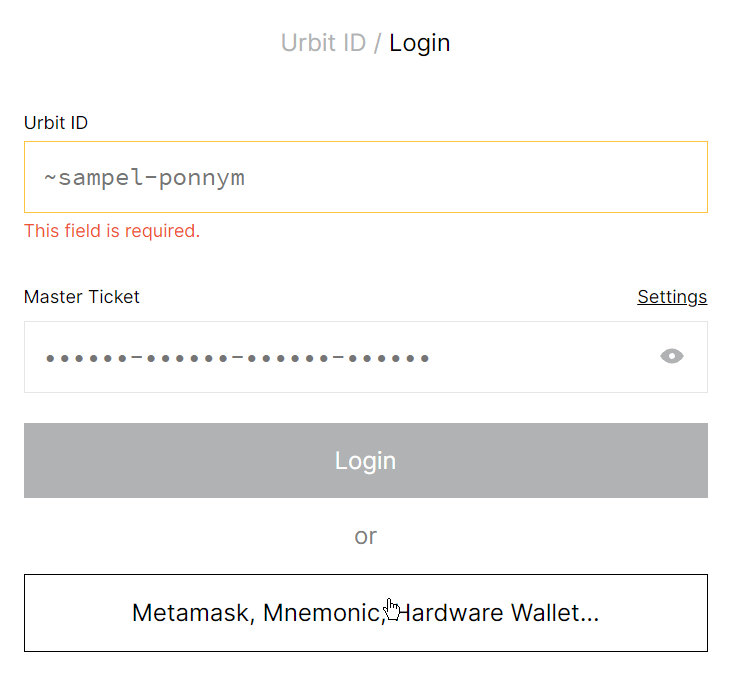
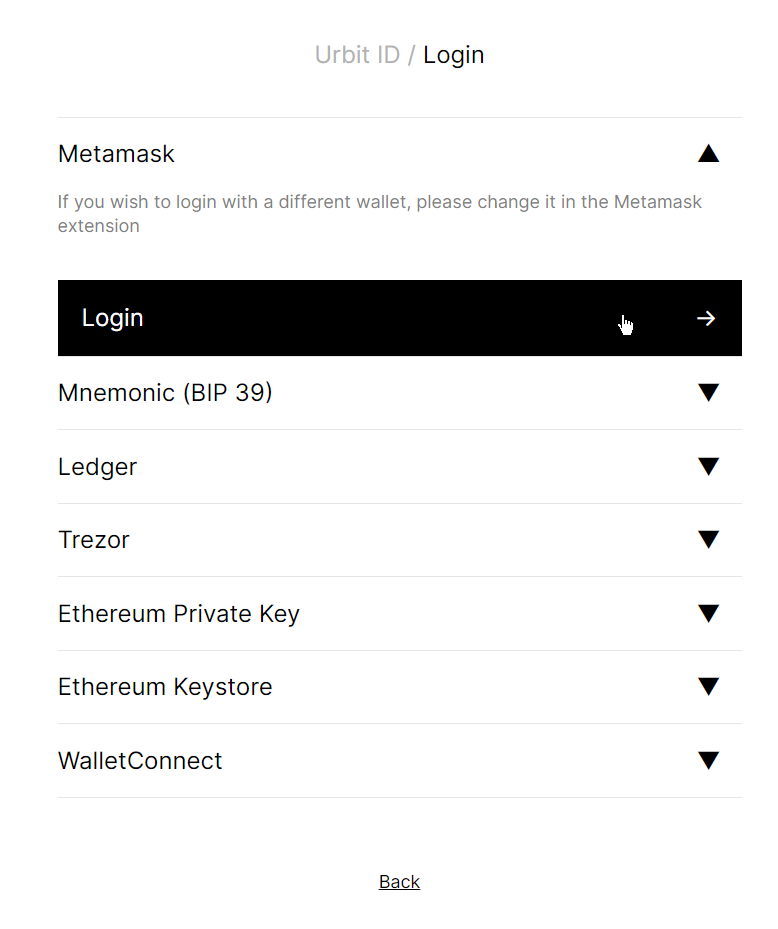
Click Metamask, Mnemoic, Hardware Wallet...
Select whichever Ethereum wallet provider you use, and connect your wallet to authenticate ownership over the planet NFT.
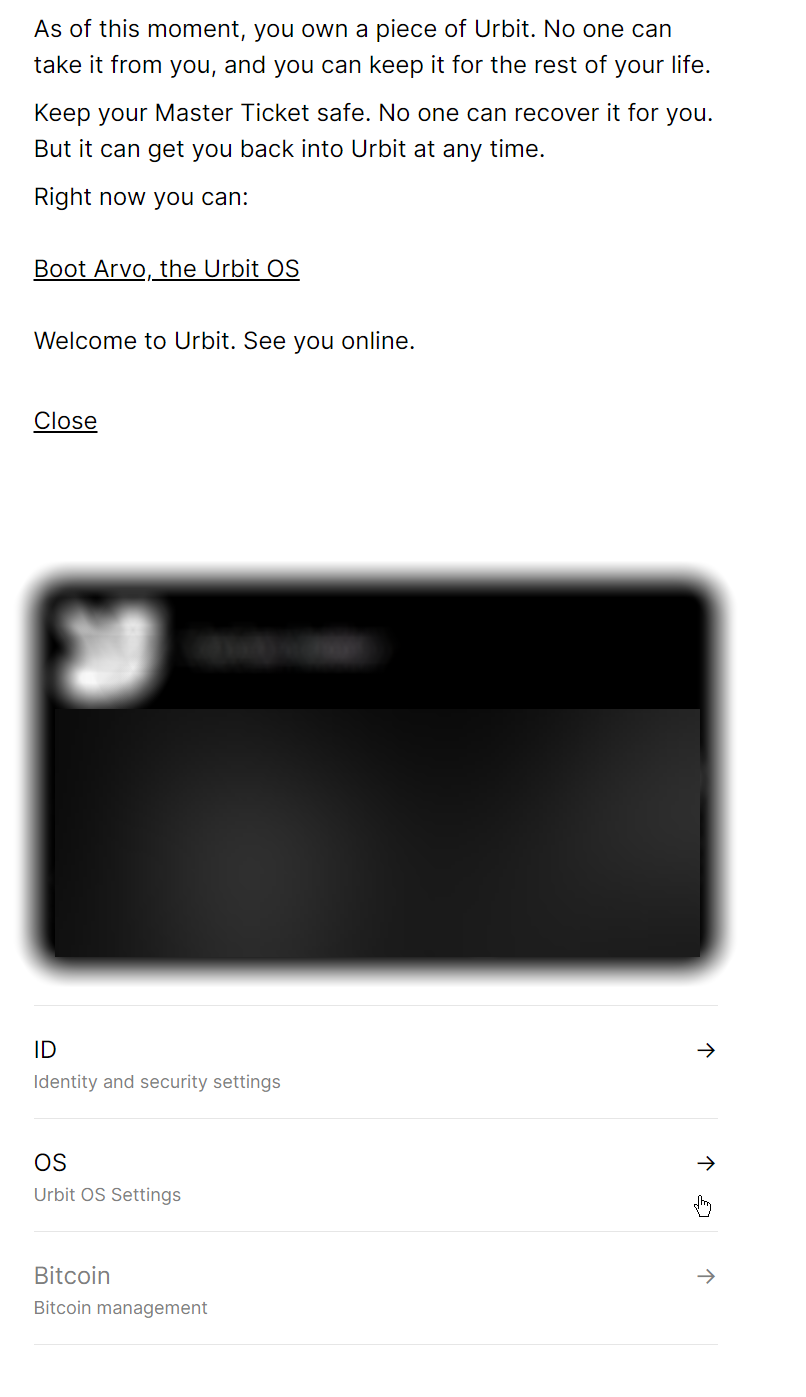
You will see a welcome message with your planet's badge and master key. Do not share this master key with anyone, as it holds access to your planet. Click on OS, Urbit OS Settings to continue.
Select Initialize Networking Keys

Select Set Networking Keys then Send Transaction
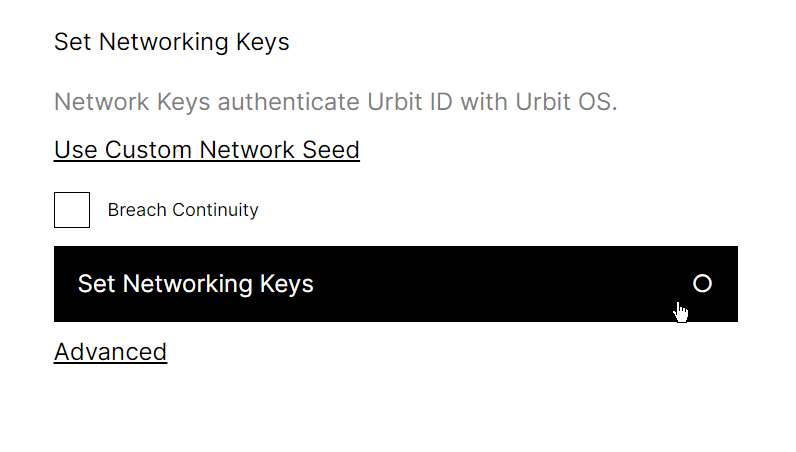
Note: You will need to pay about 0.002 ETH to submit the transaction.
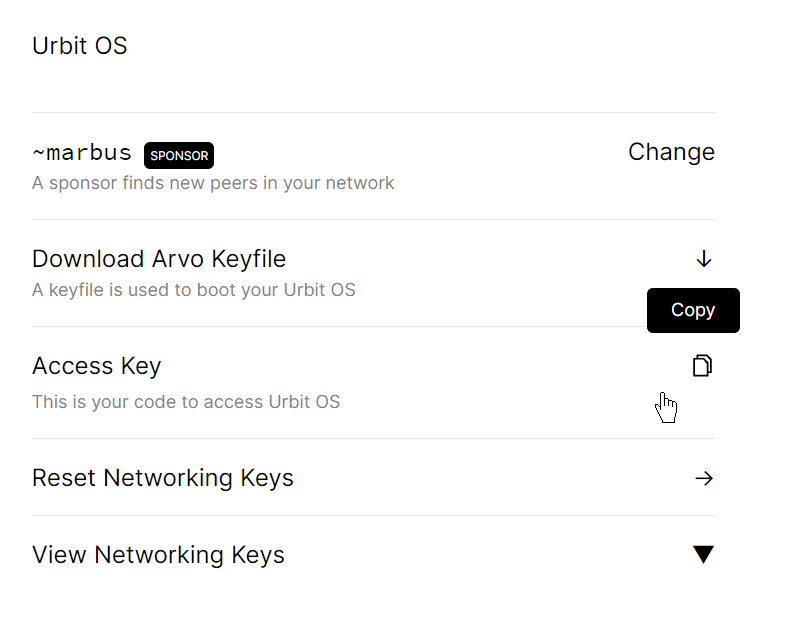
Once the transaction is complete, the "Download Arvo Keyfile" button should be available for you to press. You should receive a .key file that contains the secret needed to boot your planet. Hold onto this file.
Step 4: Configure your Planet
Copy the contents of the keyfile, then return to your console and enter the following to create a new file on your server:
nano keyfile.key
Paste the contents of the keyfile and press ctrl-x then y then enter to save and exit.
Alternatively, if you're already using your own terminal and ssh, you can transfer the file by scp: scp <local path to keyfile> root@<droplet ip address>:Next, enter the following command to boot your planet (don’t include the tilde in your planet’s name, i.e. -w loclen-hodbur):
~/urbit/urbit -w <planet name> -k keyfile.key
It will take 10-20 minutes to boot while commands spew out. You'll know the boot is complete when the prompt shows: <planet name>:dojo>
Dojo is the Urbit terminal. Once it completes, enter the following to mount the filesystem:
|mount %
Now shut down your planet with ctrl-d.
The keyfile is not needed to re-start your planet once it's been successfully booted, so we'll delete it for security with the following command:
shred -vzn 3 keyfile.key
rm keyfile.key
Next, setup a screen session:
screen -S urbitThis will start a screen session so Urbit runs continuously in the background, we can now start up the Urbit ship from the urbit directory in this session:
~/urbit/urbit -p 34543 <planet name>Finally, enter +code to generate an Access key.
This code is essentially your ship's password, copy it down for use in the next step. You can also always find it on the Bridge, under Access Key:
All set, now we can disconnect from the screen session and leave the ship running with ctrl-a d.
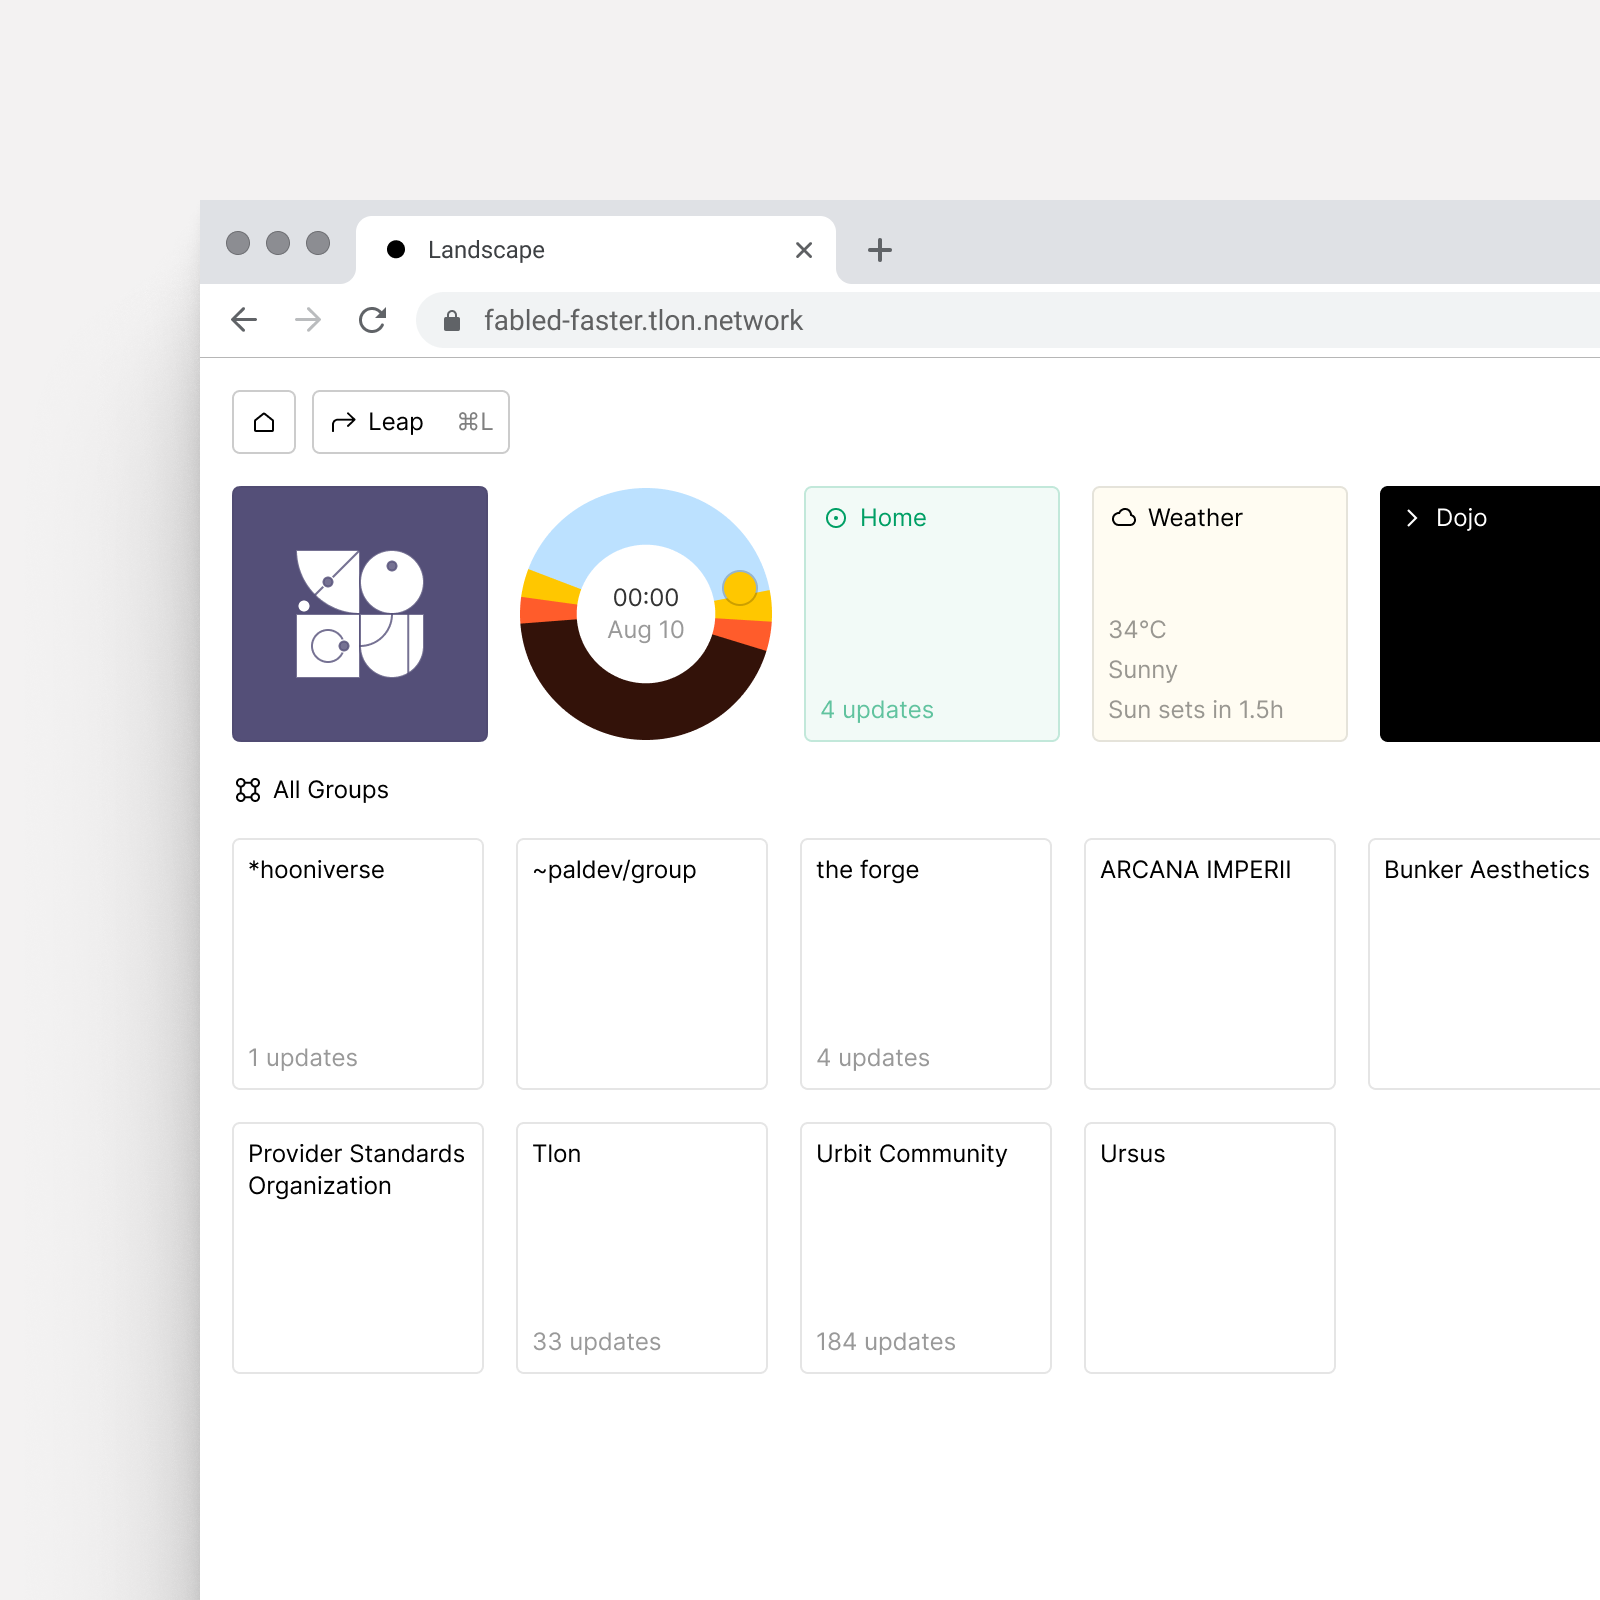
Step 5: Enter Urbit Landscape
Landscape is the default graphical interface of Urbit, accessed by your standard web browser. Now that your Urbit server is running, you can access it directly by going to your Droplet's IPv4 address as if it was a url.
You'll be greeted with a login screen, with your Access key needed to continue. Paste the code from the previous step into the Access Key field (if you lost it, just go back to the console and enter +code):
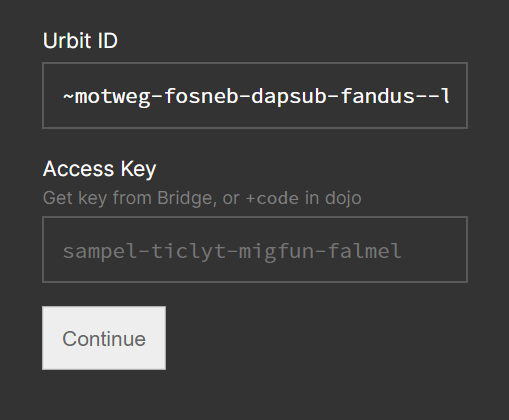
The first boot will take a few minutes as it sets up your system.
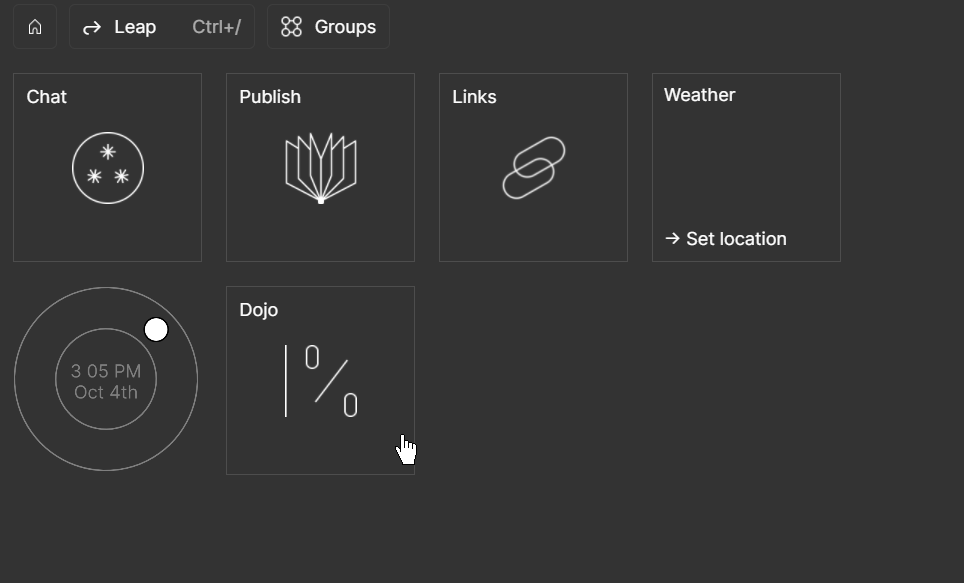
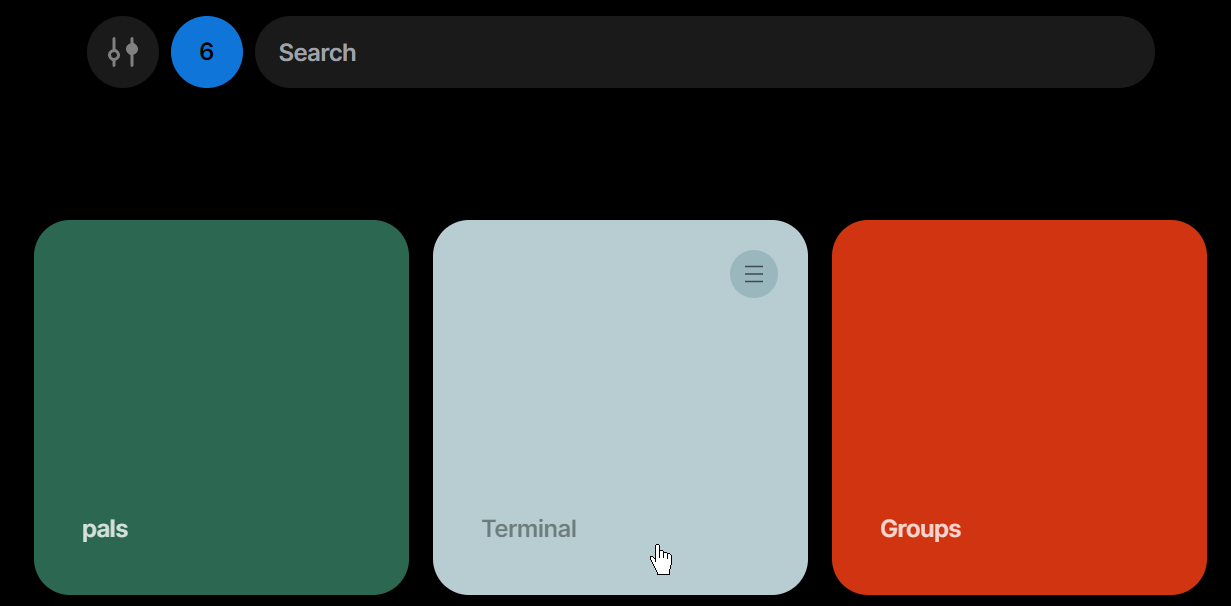
Once it's done, you'll be greeted with a dashboard of apps:
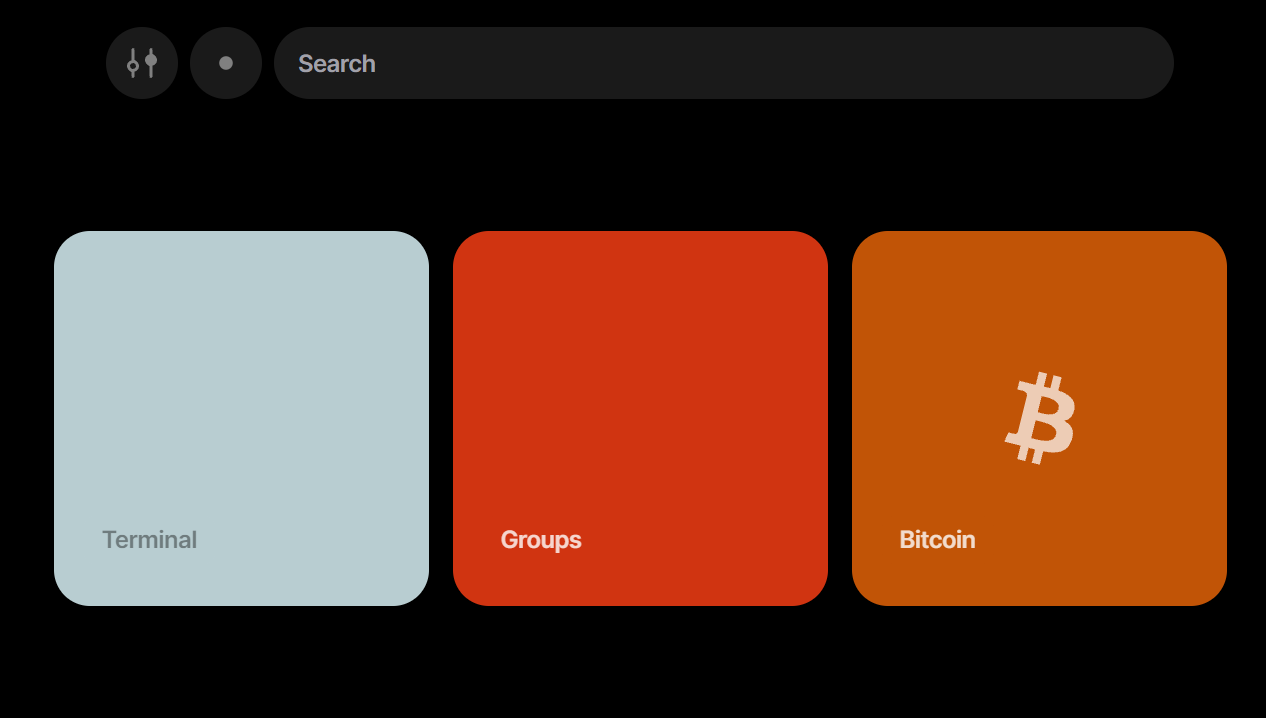
Click into Groups for the main landscape dashboard:

Congratulations, you're officially running Urbit. Current functionality includes group text chats & blogging. You will be able to access this at any time, from any web browser, by navigating to your virtual server's IP address.
Recommended groups to join:
~bitbet-bolbel/urbit-community- main community hub~bollug-worlus/urbit-index- index of notebook where other chatrooms are listed~loclen-hodbur/remco- remilia collective hangout~hiddev-dannut/new-hooniverse- hoon dev chat~sonwet/cryptocurrency-forum- crypto chat
From here you can meet other users and find your way onto other groups in the network - say hi!
A to Z: boot, run, and administer
~sampel-palnet on a droplet with IP address 123.45.67.890
# CONNECT TO THE DROPLET
ssh root@123.45.67.890

# SETUP DROPLET FIREWALL
sudo ufw allow OpenSSH
sudo ufw allow www
sudo ufw allow https
sudo ufw allow 34543/udp
sudo ufw enable

# SETUP DROPLET SWAP SPACE
sudo fallocate -l 2G /swapfile
sudo chmod 600 /swapfile
sudo mkswap /swapfile
sudo swapon /swapfile
sudo cp /etc/fstab /etc/fstab.bak
echo '/swapfile none swap sw 0 0' | sudo tee -a /etc/fstab

# INSTALL URBIT
mkdir ~/urbit
cd ~/urbit
wget --content-disposition https://urbit.org/install/linux64/latest
tar zxvf ./linux64.tgz --strip=1
cd ..
~/urbit/urbit

# UPLOAD KEYFILE **run this command on your local machine**

scp ~/Downloads/sampel-palnet.key root@123.45.67.890:

# BOOT THE PLANET

~/urbit/urbit -w sampel-palnet -k sampel-palnet.key

# MOUNT THE PLANET
|mount %

# SHUTDOWN PLANET AND DELETE KEYFILE
ctrl-d
shred -vzn 3 sampel-palnet.key
rm sampel-palnet.key

# CREATE SCREEN
screen -S urbit

# RESTART PLANET IN PORT 34543
~/urbit/urbit -p 34543 sampel-palnet

# GENERATE LANDSCAPE PASSCODE
+code

# DETACH & DISCONNECT
ctrl-a d
exit
Part 2: Pointing Urbit to a domain
Setting up your own domain will make accessing your Urbit a lot easier, giving a memorable url you can navigate to rather than an IP address. It'll also allow you to secure things with an SSL certification.
You have a couple options:
A. Provide your own domain
B. Obtain a free subdomain through Urbit (will take a few days, but setup is automated)
A. Provide your own Domain
If you don't already have a domain, you will need to purchase one. A standard .com domain is ~$12/year.
If you want to use a free subdomain, skip to A1a. Free Subdomain with a Third-party, however you'll need to log in every 6 months to keep it registered.
There are a lot of domain name registrars you can use, this guide suggests Google Domains.
From there you can search for and register a domain that you like. You can also point to a subdomain of any domain you own, but you will need to have the nameservers pointing to the cloud server.
A1. Configure domain name servers to Digital Ocean
Once you've registered your domain, you'll need to configure it to point to your VPS name servers. For Digital Ocean, that's:
ns1.digitalocean.comns2.digitalocean.comns3.digitalocean.com
The steps to do so vary slightly by domain providers, but for Google Domains, just navigate to DNS:
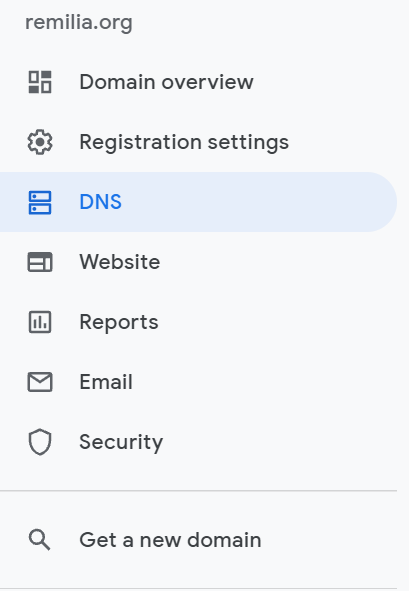
Then click Custom Name Servers:

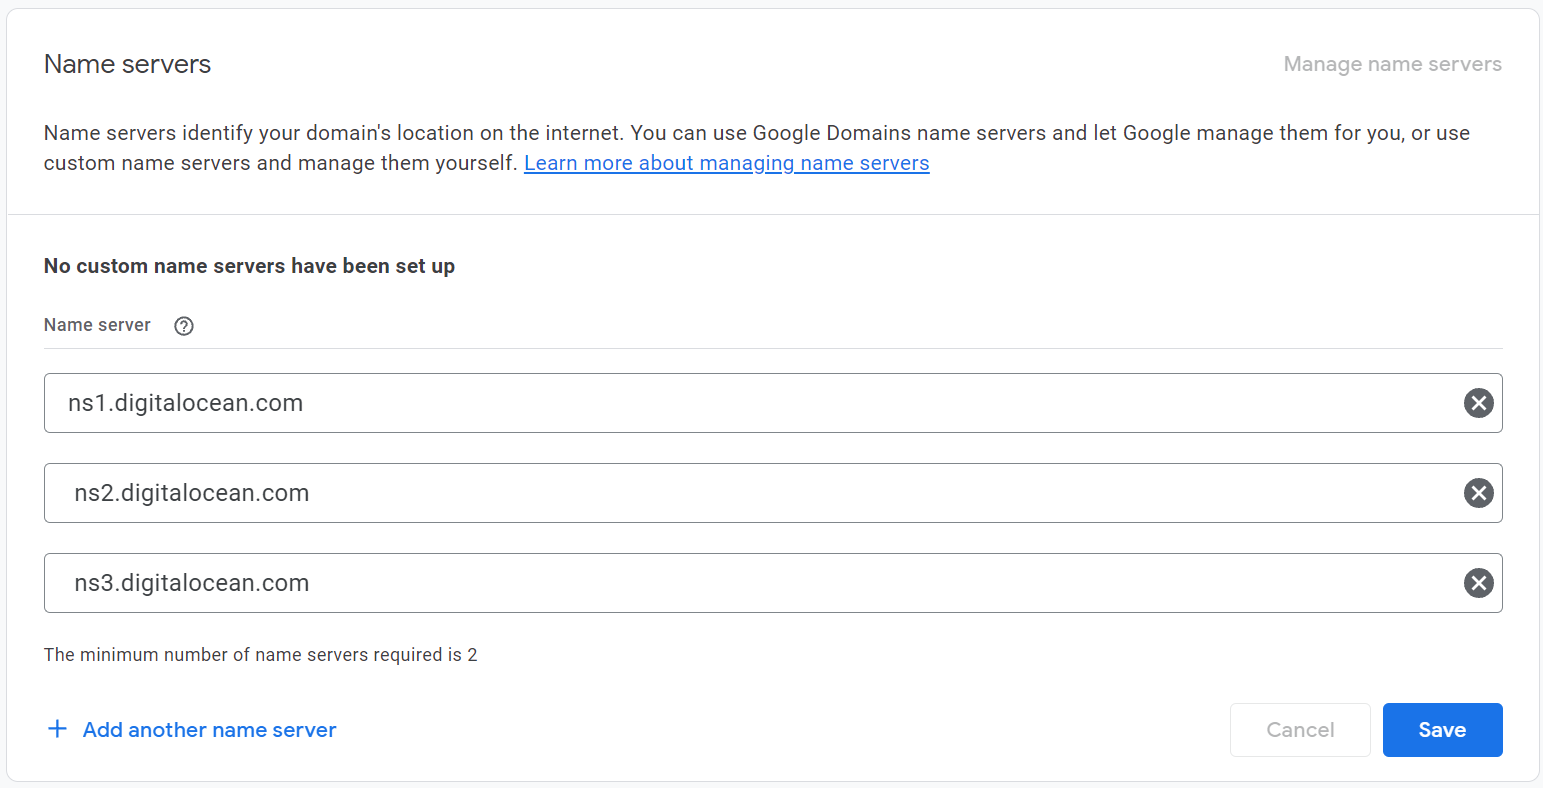
And enter the 3 digital ocean name servers and hit save:
ns1.digitalocean.comns2.digitalocean.comns3.digitalocean.com
Now that you've updated the DNS records you can add the domain to your Digital Ocean droplet. Skip to A2: Point Digital Ocean to your Domain.
A1a. Free Subdomain with a third-party (Afraid.org)
You can setup a free subdomain with afraid.org, however you will need to make sure to login once every 6 months for it to remain active. Simply create an account, then goto registry on the left side, and pick a domain to register under.
Set the Type to NS, choose your subdomain and set the destination to ns1.digitalocean.com:
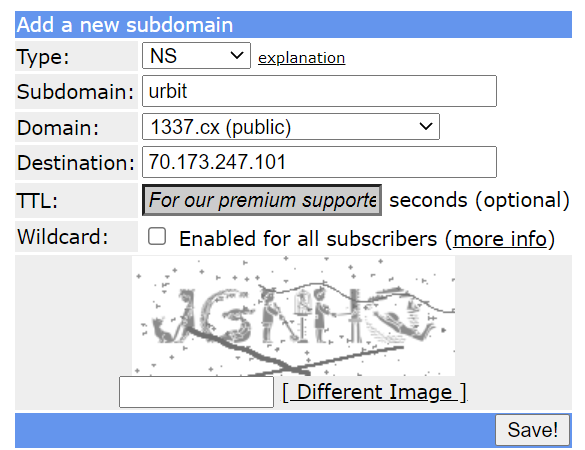
In this example, your domain would be urbit.1337.cx
Now that you've setup your domain, continue to A2: Point Digital Ocean to your Domain.
A2. Point Digital Ocean to your Domain
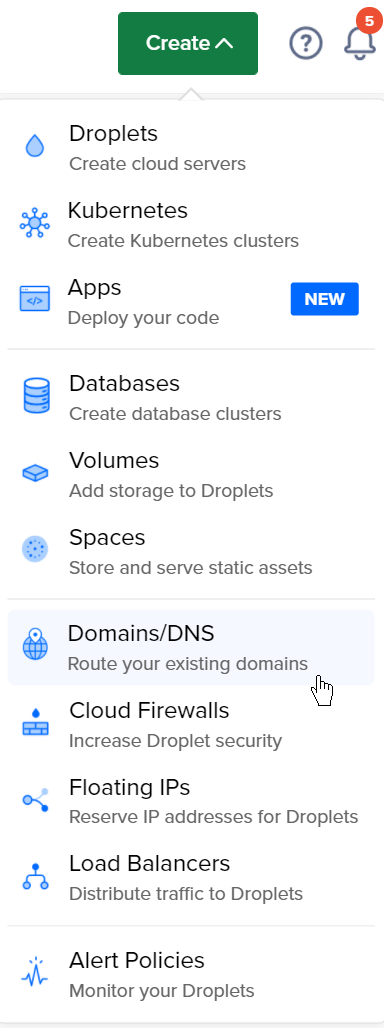
Back on Digital Ocean, go to Create > Domains/DNS
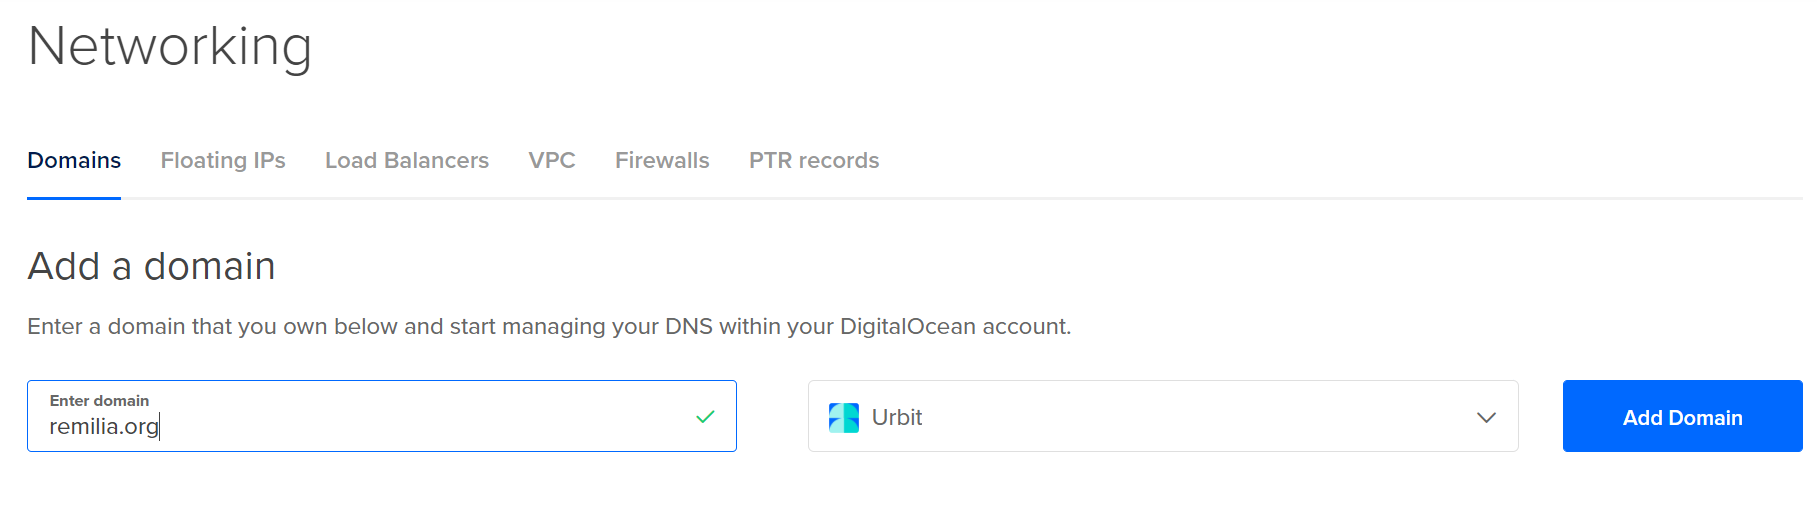
Enter your domain and hit Add a domain
Click on that domain and add an A record that directs to the IP of your droplet (found on your droplet's page).
It will automatically take you to the Create new record page.
Under hostname, enter your subdomain, or if you intend to make it main domain, enter @. Under Will Direct To, select your Digital Ocean droplet. Change TTL to 60 to update quickly, then hit Create Record

A3. Obtain an SSL Cert
Now we run a few commands in Dojo to request an SSL cert for your domain through Let's Encrypt.
Navigate back to your Urbit page, and click the Dojo app. This is the Urbit terminal.
Enter the following command, which will run the acme agent that requests an SSL certification, replace tld with whatever your top-level domain is e.g. com in example.com:
:acme &path /tld/domain/subdomainSubdomain is optional and that part of the command should be omitted if you are not using a subdomain.
Check your domain, if everything is working properly you should see your login page. Log in with your access key like normal and you should enter Urbit Landscape. You can now access from this domain whenever you want.
B. Obtain a subdomain from Tlon
Tlon Corporation offers a free subdomain service under arvo.network, however it will take a few days to register.
On your main Urbit, select the terminal:
Enter the following command, replacing .123.45.67.890 with your IP address (include the period preceding the numbers):
-dns-address &dns-address [%if .123.45.67.890]Let it run, and once you receive confirmed access via ship.arvo.network, you'll be able to navigate to your sampel-palnet.arvo.network (replacing sampel-palnet with your ship name) to access Urbit.
Part 3: Configuring S3 storage for your urbit

S3 (Simple Storage Service) storage is essentially your Urbit server's hard drive for any files larger than text. You'll need it configured if you'd like to share images, such as in chat or notebooks.
The official S3 is run by Amazon, but other providers run compatible services – Digital Ocean's is called Spaces, and it is built to be interchangeable with AWS S3’s API. You don’t need to be running your ship on Digital Ocean to use Spaces with it, though the provider you use does have to support Signature Version 2.
Step 1: Create a Space
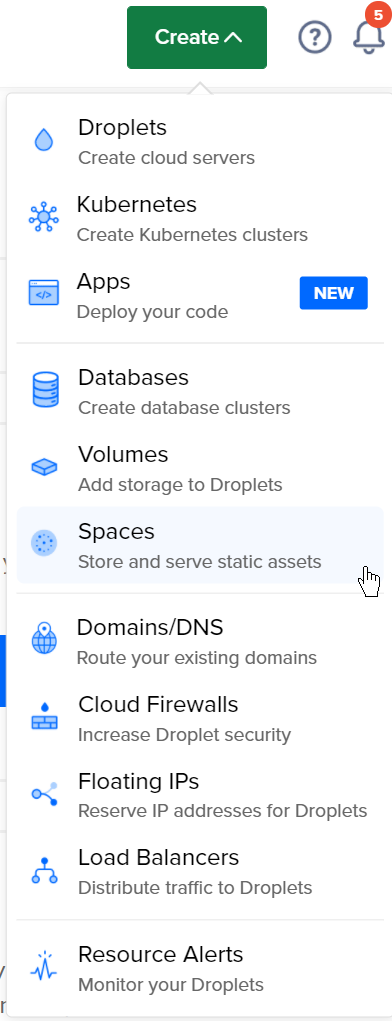
On Digital Ocean, goto Create and find Spaces in the dropdown:
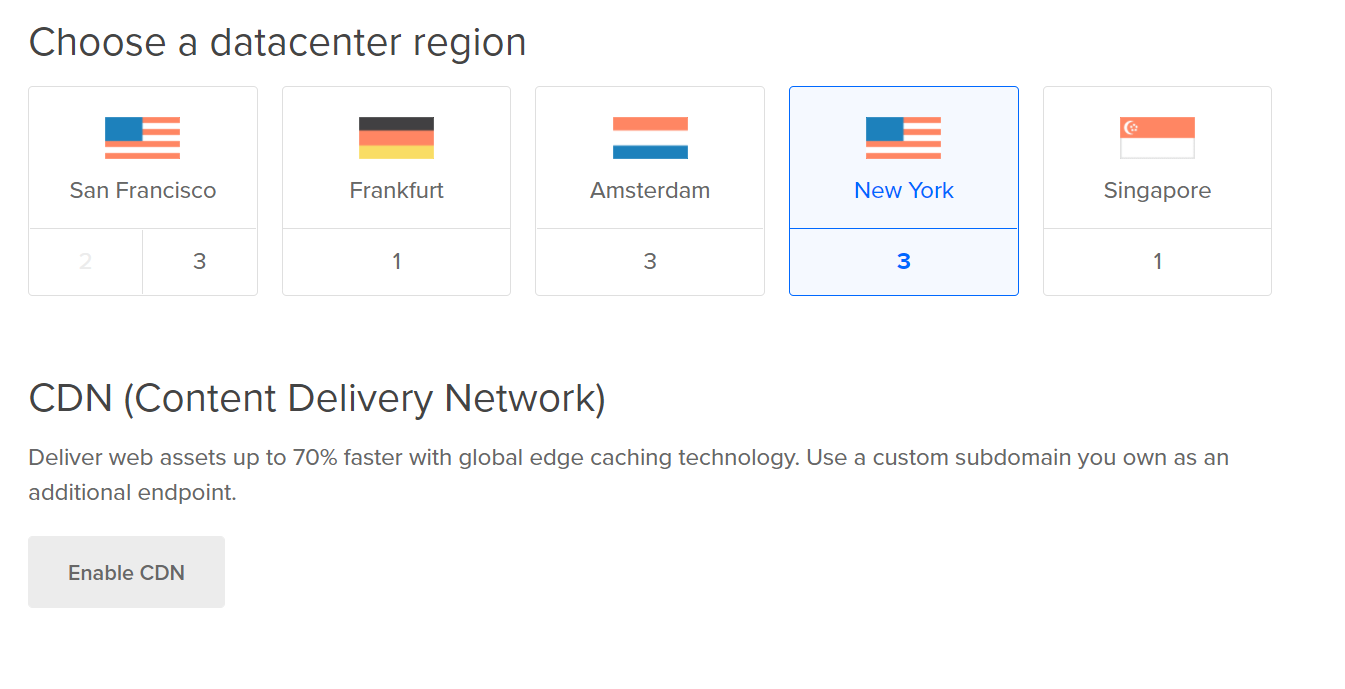
Choose a datacenter closest to your location. Leave CDN disabled.
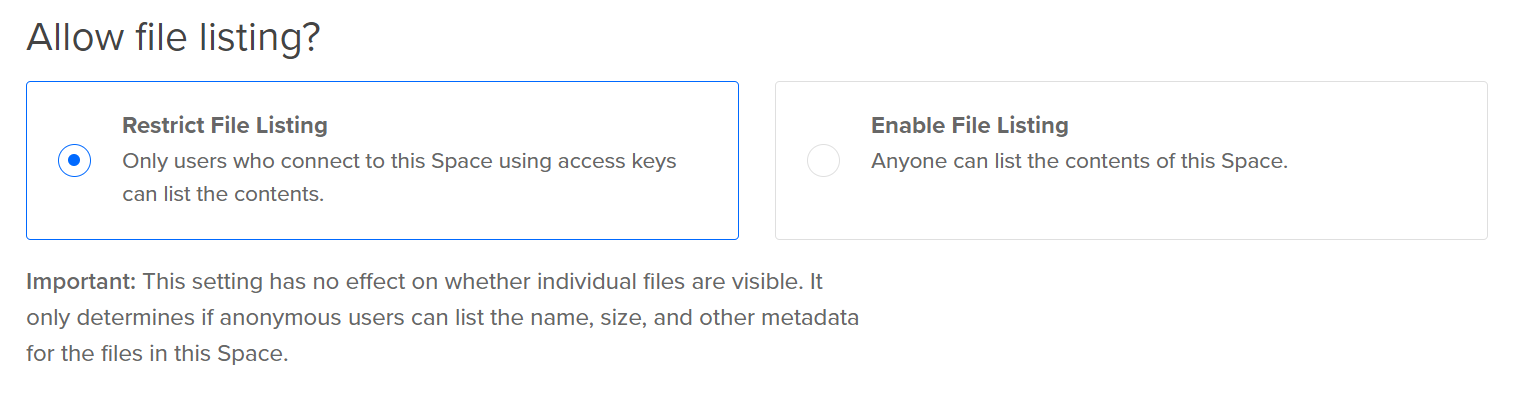
Leave file listing on Restrict File Listing
Give it a unique name and select your project.
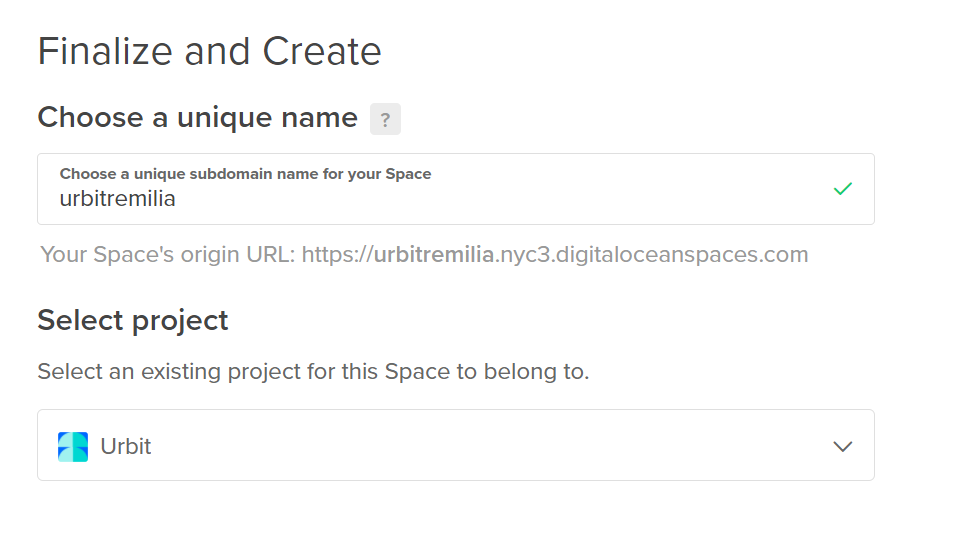
Click Create a Space.
After it sets up, you'll be redirected to the spaces page. Goto settings.
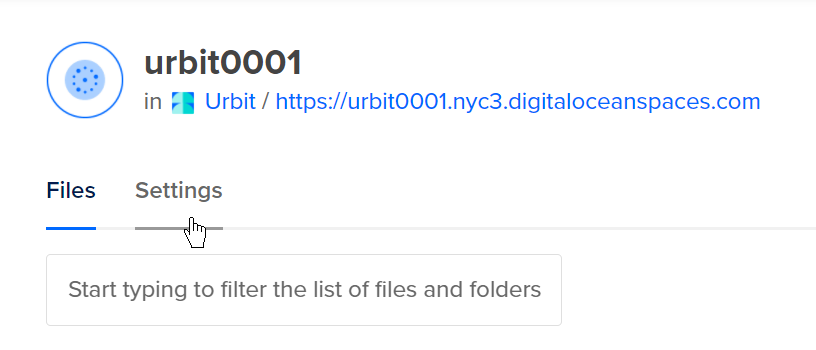
Then goto CORS Configurations and click Add.

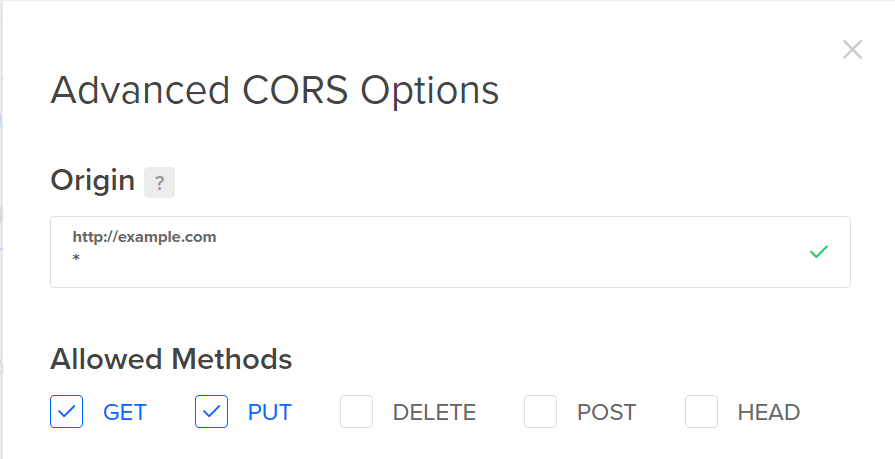
We want to add three rules – in the Origin box, put a *, then check Get and Put.
Finally, click ‘Add header’, and add another *.
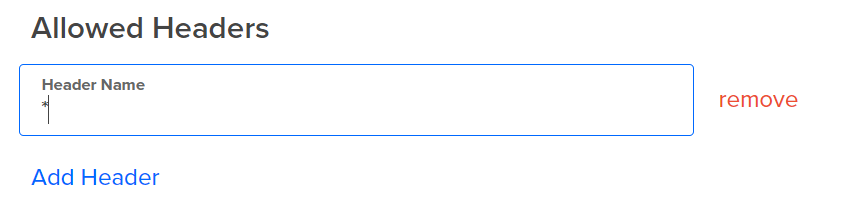
We have one last step before we enable this on our ship – getting our API keys.
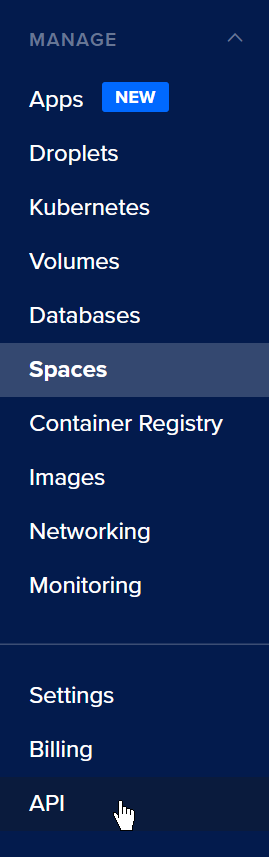
In the main navigation bar on the left, look for API towards the bottom and select it:
Scroll down and you’ll see Spaces access keys; select Generate new key.
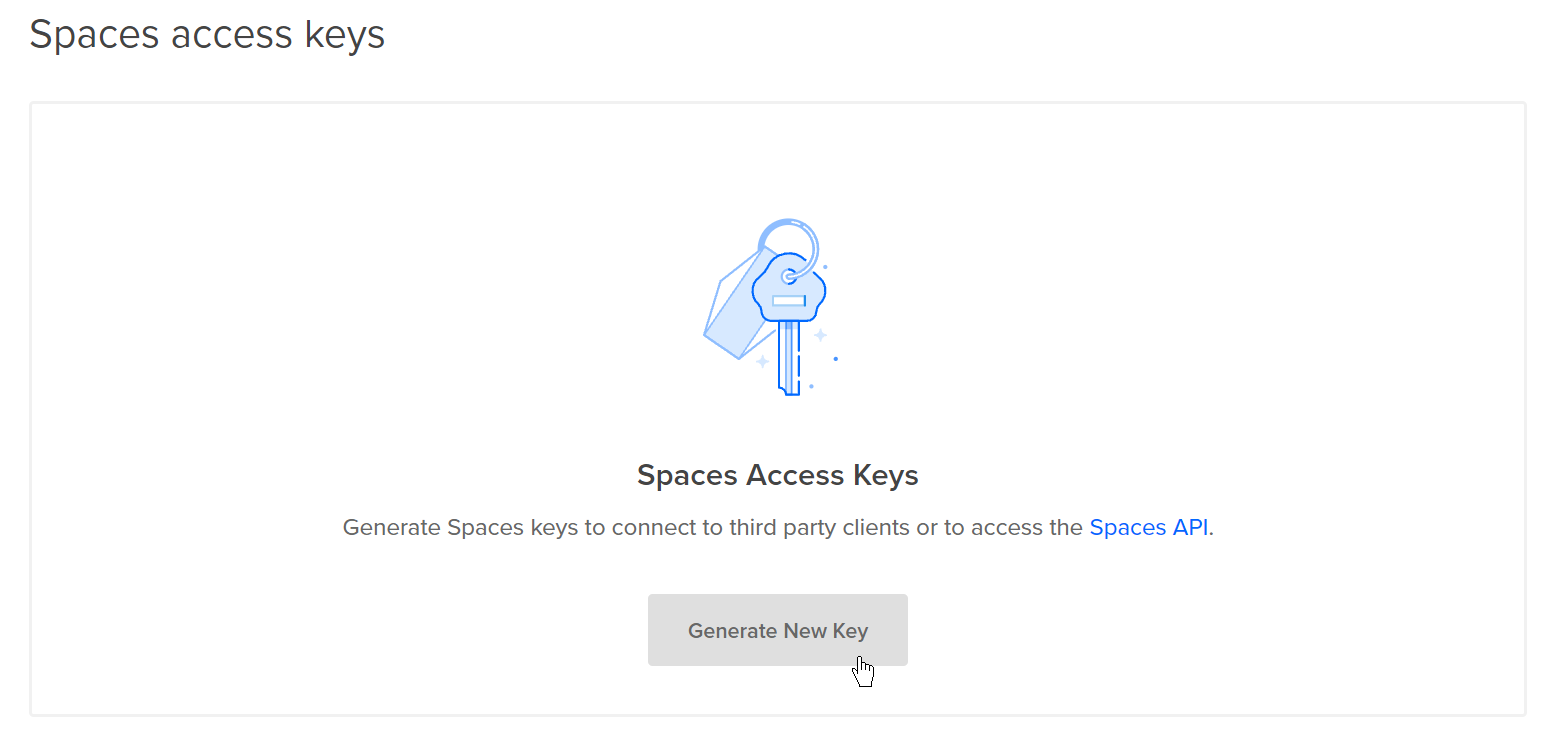
Give it a name and hit the checkmark.

It will give you two lines of random text – the top one is your access key, and the bottom is your secret key.
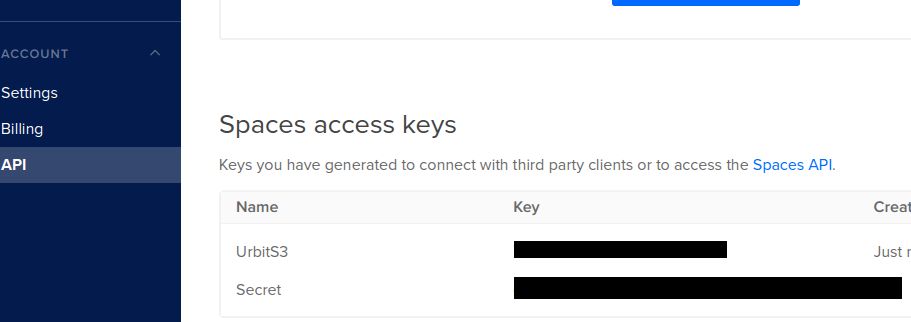
Think of them as your username and password; do not share them or post them publicly, unless you want strangers abusing your storage.
Step 2. Ship configuration
Now, let’s tell our ship how to use it.
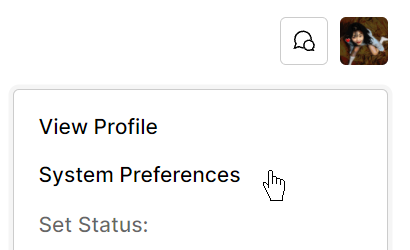
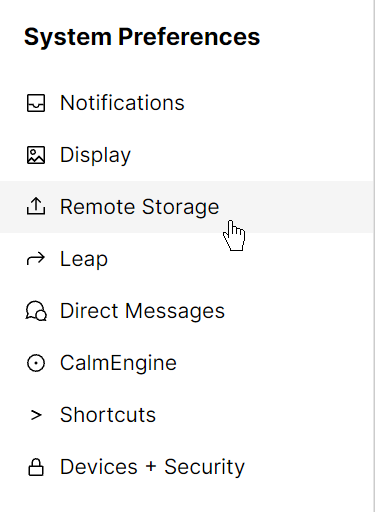
Open Landscape, click your profile at the top right corner, and select System preferences
Then select Remote Storage.
Add your Access Key ID and your Secret Access Key.

Now go back to Digital Ocean and navigate to Spaces from the sidebar. Scroll down to the Endpoint section and copy the provided url.
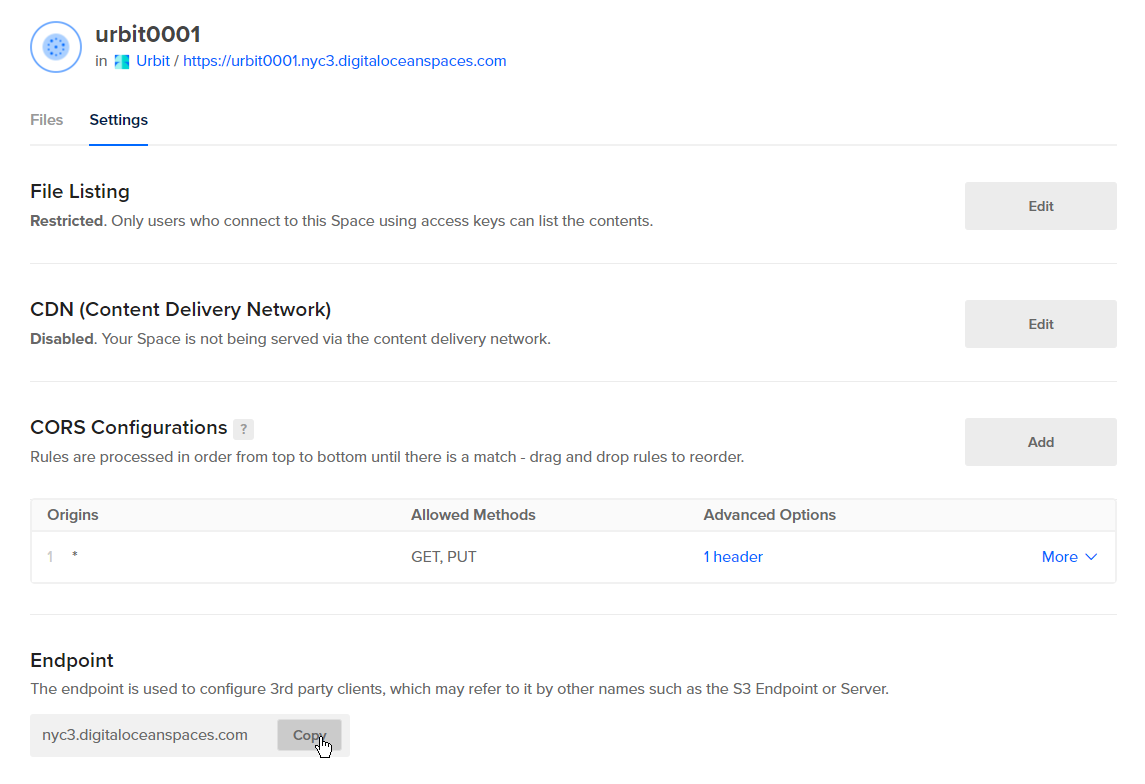
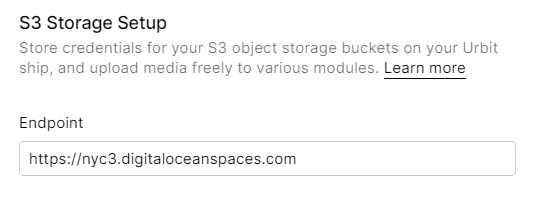
Add it to under Endpoint:
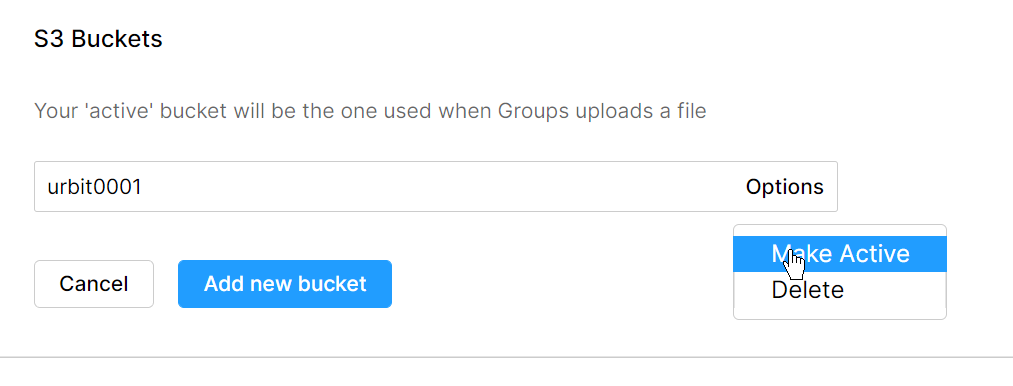
Under s3 Buckets, click add new bucket and add your Space name without the rest of the url:

Hit submit and then click options and select Make Active
That's it, you're all set with storage.
Alternatively, you can enter your credentials in the command line. Let’s proceed to our dojo (CLI or Landscape). Enter the following commands, replacing the variables in single quotes with your own details:
urbit - sampel-palnet
~sampel-palnet:dojo> :s3-store|set-endpoint 'ams3.digitaloceanspaces.com'
~sampel-palnet:dojo> :s3-store|set-access-key-id 'ACCESSKEY'
~sampel-palnet:dojo> :s3-store|set-secret-access-key '5eCrEtK3Y/8L4H8L4H'
~sampel-palnet:dojo> :s3-store|set-current-bucket 'bucketname'
Guide has been built as a compilation from the Urbit documentation as well as the following guides: