Urbit for Normies: Installing Urbit on Windows 10 with Docker Desktop
Step-by-step guide to launching Urbit on Windows 10 through Docker desktop. ETA: 30 minutes.
Materials taken from subject.network's guides (WSL2, Docker), compiled together and reformatted for clarity.
What is Urbit?
Urbit is:
- an open source platform for sovereign personal computing
- a new internet from first principles
- an archipelago of hypercultures
You can read more details here, or in the official documentation.

Installing Urbit on Windows
Steps:
- Install WSL2 Ubuntu
- Install Docker Desktop
- Install Urbit
- Booting up Urbit
Note: Urbit is ideally run on an always-on server. Running it on a personal machine that's not always online should only be for playing around and testing, but if you're serious about using Urbit and don't have a server at home, I would recommend a cloud installation. This can be done for $10/mon on Digital Ocean, or free on Oracle Cloud S3.
Install WSL2 Ubuntu
Check/Update Windows 10 Version
You will need to make sure your Windows 10 installation is updated to at least version 1903 build 18917. You can check your Windows version by opening Settings > About:

If your version is too low, you will need to update. Head here and use Microsoft’s installer:
https://www.microsoft.com/en-us/software-download/windows10
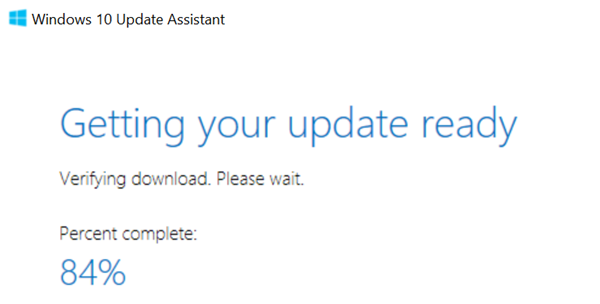
This may take a while, up to a few hours.
Enabling WSL
Once your update has completed, launch PowerShell. You can click the start button and start typing ‘powershell’; be sure to run it as an administrator.
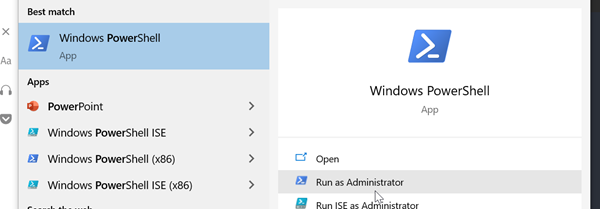
Right click on the PowerShell window and paste this into it:
```PS C:\> dism.exe /online /enable-feature /featurename:Microsoft-Windows-Subsystem-Linux /all /norestart```
Press enter to enable WSL1:
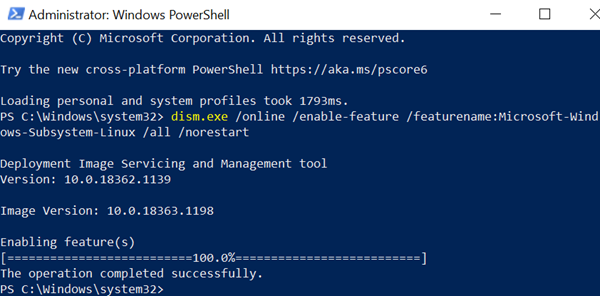
Now paste this command into PowerShell to enable virtualization (necessary for WSL2):
```PS C:\> dism.exe /online /enable-feature /featurename:VirtualMachinePlatform /all /norestart```
Now you must restart your computer.
When you’re back up, install this WSL update:
https://wslstorestorage.blob.core.windows.net/wslblob/wsl_update_x64.msi
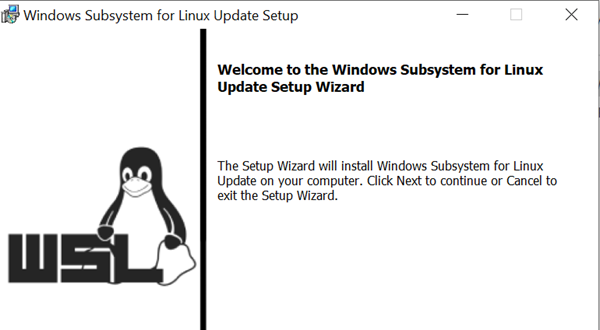
Once this installation is complete, your computer is able to run WSL2.
Note: if you would like to run Urbit directly on WSL2 Ubuntu instead of Docker Desktop, continue with the steps on this guide starting at Running WSL2.
Installing Docker Desktop
Install Winget
Before we install Docker, we'll need a couple Windows tools.
First, install the App Installer package in the Windows Store if you don't already have it.
Next, we will install winget. Navigate to microsoft/winget-cli/releases, find the dropdown for "Assets", and select the ~20MB download link for the file ending in .msixbundle:

Open the Microsoft.DesktopAppInstaller...msixbundle file from your Downloads, and then hit update to install winget:

Install Docker Desktop
Open up the command prompt. You can click the start button and start typing ‘cmd’ to find it:
[ SSHOT missing]
Run the following command:
```winget install docker```
You should see the bar progress for a minute or two while it installs.

Once it’s completed, restart your computer.
Installing Urbit
Open up your start menu and you should see a new entry for Docker Desktop:
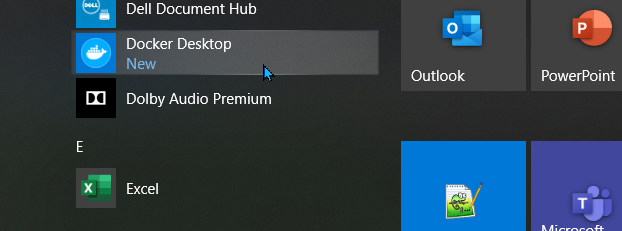
Go ahead and open it.
Now, return to the command prompt, and run the following command:
```docker volume create urbit```
Now open up a folder, and navigate to this path by pasting the address into the bar:
\\wsl$\docker-desktop-data\version-pack-data\community\docker\volumes\urbit\_data
Now create an empty file named with the extension .comet – for instance, mycomet.comet. This will tell Docker create a comet with the name mycomet.
The easiest way to create a blank file is to right click an empty spot in the folder, select ‘New’, ‘text file’, and rename the file it creates to get rid of the .txt extension. You will need to enable visible file extensions if you haven’t already:
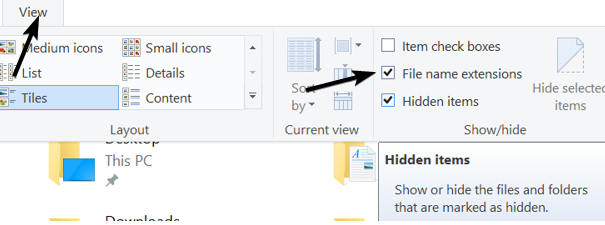
if you already have a planet and want to boot it for the first time, you can paste the keyfile from Bridge in here instead. If you want to move an existing ship, shut your ship down and copy the pier directory into this folder instead. Either way, I recommend booting a comet first, to make sure everything works right.
Before we boot, let’s forward the port it’s going to use. This will allow your ship to have direct connections with other ships, instead of routing the connections through other nodes.
The Docker image uses UDP 34343 by default – go ahead and forward that port on your router to the device running your ship (make sure it’s UDP!). There’s no single standard way to forward ports on different kinds of routers, but you can find generic instructions here if you have trouble.
Booting up
Open another command prompt and paste the following command into it:
cmd.exe:
```docker run -p 80:80 -p 34343:34343/udp -it --restart always --mount type=volume,source=urbit,destination=/urbit --name urbit tloncorp/urbit```
You should see the urbit process start up and mine an identity, then download and compile its source code.

That’s it! You’ve booted you ship and are ready to explore the network.
Type +code into the urbit command line, and copy the four word password it generates by highlighting and right clicking.
Open your web browser and navigate to http://localhost:

Log in by pasting the password.
If you’re brand new to the network, here are a couple of good groups for beginners to join:
| Address | Description |
|---|---|
| ~bitbet-bolbel/urbit-community | The biggest group on the network, filled with cool resources |
| ~bollug-worlus/urbit-index | Contains a notebook called ‘Directory’ with a list of public groups you can join |
| ~matwet/networked-subject | The group associated with this blog – feel free to say hi, ask questions or give feedback |
Big thanks again to ~botter-nidnul for the original tutorial and his help and feedback with drafting this!
Misc & troubleshooting
- You can detach from the command line running your ship by pressing
ctrl-p,ctrl-q– this lets you close the command prompt without exiting the process. You can reattach to it withdocker attach urbit. - You can tell Docker to automatically run on startup by going to the configuration menu:

- You can install a container for Watchtower that will automatically update your containers for you with this command:
```docker run -d --restart always --name watchtower -v /var/run/docker.sock:/var/run/docker.sock containrrr/watchtower```
- You can turn your container on and off inside the Docker Desktop app:

- If your urbit won’t restart, check out ~botter’s solution for deleting the
.vere.lockfile inside your\urbit\_datafolder.